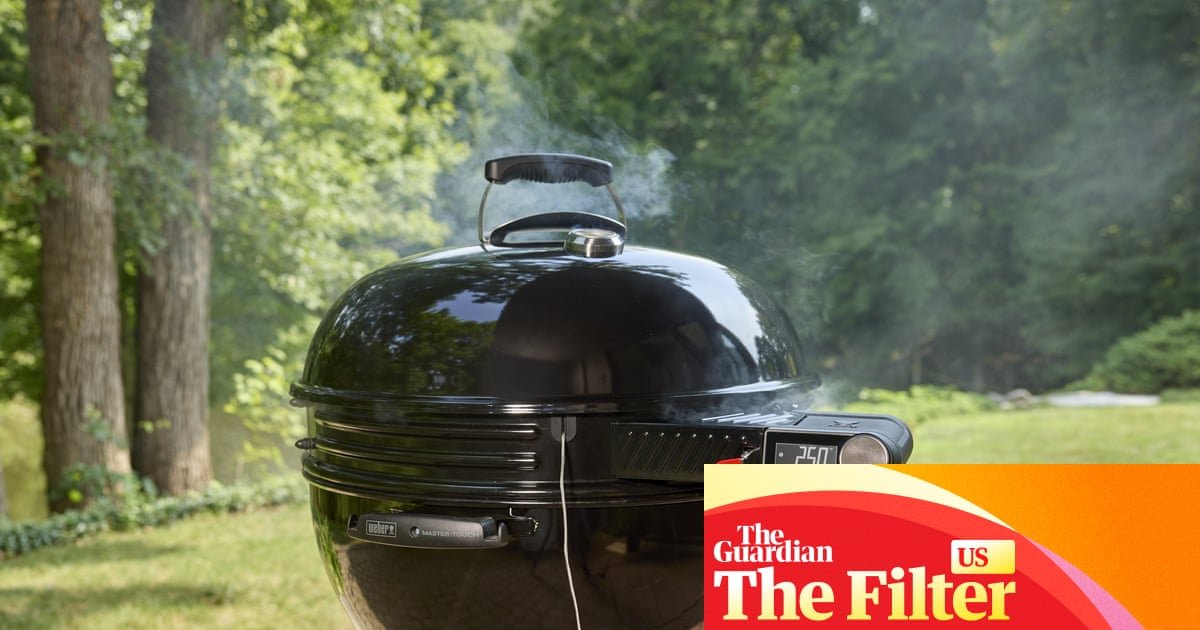

The ball-shaped kettle grill is a classic of the genre that has long defined backyard cooking, and on its own, is remarkably versatile. Beyond burgers and hot dogs, it excels at roasting and, with some fire management technique, smoking barbecue. For years, backyard grillers have turned to digital thermostats to regulate airflow and charcoal’s temperature – turning kettles into very capable smokers. But adapting one to a kettle often requires drilling a hole into the bowl – not exactly great for your warranty.
Weber’s new Kettle Smart Ring offers a cleaner solution for your standard 22in-wide grill. The three-piece donut-shaped ring rests between the bowl and lid, adding a controller, fan and ambient temperature probe that work together to regulate airflow to maintain your target cooking temperature. Paired with Weber’s smartphone app, and with the proper charcoal setup, it can hold temperatures from about 180F to 450F (82C to 232C), to handle everything from smoking pulled pork to roasting a turkey.
From traditional charcoal grills to pellet smokers and cutting-edge infrared grills, I have spent years covering and reviewing outdoor cookers. My verdict: smoking barbecue on a kettle grill is nothing new, but the Kettle Smart Ring makes it easier for newbies. (And if you are a newbie grill-master, consider adding some heavy-duty barbecue gloves and a set of prep and serving trays to your arsenal.)
Who is the Weber Kettle Smart Ring for?
This accessory is a good entry point into making real barbecue – it’s easier and can make your introduction to real barbecue easier and less expensive than buying a dedicated smoker. It isn’t as hands-off as a fully automated pellet smoker that feeds itself fuel, but it produces food with a more pronounced barbecue flavor. Adding it to a kettle also preserves your ability to grill – something pellet smokers generally can’t match.
Expect to spend a few cooks learning how the fan affects the fire: how much charcoal to use, how to adjust the top vent, how long the fuel lasts and, most importantly, how long it takes food to reach its target internal temperature. Weber’s app is easy to use and lets you remotely adjust two key settings: the kettle’s ambient temperature and the probe’s target temperature. Together, those controls make it less likely that you’ll overcook a steak.
What makes the Kettle Smart Ring worth it?
Backyard pit-masters have been turning out brisket, pork shoulder and ribs on these humble cookers for decades with little more than charcoal, wood chunks and careful vent adjustments. Hold the fire between 225F and 250F – the barbecue sweet spot – for hours, and a kettle can best pellet smokers that cost far more.
The Kettle Smart Ring strikes a balance between traditional charcoal cooking and smart technology. It raises the grill by about 4in, adding automation without fundamentally changing how you grill.
Getting ready to grill
Putting everything together takes only a few minutes. First, make sure there’s a nearby outdoor outlet within range of your home’s wifi network, as the controller needs power to operate. (Weber supplies a 6ft-long power cord with a standard wall plug on one end and USB-C on the other.) The controller draws just 5 volts at 12 watts, so you can also run it with a portable power station that has a USB-C port, making it easier to position the grill wherever it has the strongest wifi signal.
When you set the ring in place, its metal air chute hugs the inside of the bowl and positions its outlet just above the charcoal grate, forming an “L” shape with a short lower leg. Beneath the controller are two probe ports, and Weber includes one leave-in thermometer in the box. The probes you may already have could work, but they’re often calibrated for different controllers, so temperature readings may not be accurate. Additional Weber-specific probes cost $25 each. Weber also added silicone-gasketed pass-throughs cut into the ring that allow rotisserie accessories to fit without modification. Use Weber’s rotisserie or any third-party model designed to fit a 22in kettle.
The grill’s lid seals tightly against the ring’s porcelain-enameled edges, and the top vent should be positioned opposite the fan for proper airflow. The accessory fits Weber’s 22in kettle grills, including Performer models that use the same bowl. Although many other manufacturers also build 22in kettles, compatibility with non-Weber brands is unclear. Storage is the only real downside. The standard kettle cover no longer fits with the ring installed, so you’ll have to remove it before storing the grill – it’s designed to be easy to remove, so you can go from smoking with the ring on to grilling with the ring off.
What’s it like using the Kettle Smart Ring?
After placing the Kettle Smart Ring on a Weber 22in Premium Grill, I had to do a little reading: Weber recommends two charcoal setups, depending on the temperature you want to reach. If you can roast a chicken or other larger cuts, the instructions will feel straightforward. But if this is your first (or maybe third) rodeo, it might take two or three uses before the charcoal setup feels intuitive.
To maintain temperatures between 180F and 350F, Weber suggests a “sloppy snake” of briquettes loosely curled around a 9x13in disposable aluminum pan, with the lid vents open one-quarter of the way. For roasting temperatures – from 350F to 445F – create a two-zone fire setup. Bank the briquettes into a pile on one side of the grill and place the aluminum pan on the empty side with the lid vents half open. Regardless of your setup, Weber recommends keeping the charcoal 4-5in from the fan’s air chute, so air can circulate around the bowl, evening out temperatures around your food, and keeping the fire under control.
For both setups, keep the bottom vent closed and use three to four pounds of briquettes – 60 to 100 chunks, which is slightly less than a standard chimney starter’s worth of Kingsford. Generally, you can expect about four to six hours of heat from 3lbs of charcoal and six to eight hours from 4lbs.
Over a couple of cooks, I smoked two 10- to 12lb pork butts and several racks of ribs. I used Weber’s wireless probe in the meat, set to alert me at 203F. To check the temperatures Weber was reading, I used ThermoWorks’ RFX, an ambient probe clipped about 2in away from the food, to measure the air temperature the meat was actually sitting in.
after newsletter promotion
The first cook
I built a loose, roughly 3lb charcoal snake around the edge of the disposable pan, studded with chunks of cherry wood for smoke. I lit a couple of fire starter cubes directly on the charcoal grate and placed about four briquettes around them to get the fire going. After about five minutes, per Weber’s instructions, I turned the controller on, pulled the red-handled gate door open, and set it to run at 225F, and watched as it immediately started pushing air onto the starter cubes, causing the flame to grow. Satisfied by the growing flames, I put the lid back on the grill and let the kettle warm up.
After about 20 minutes, after the temperature stabilized, I set the pork butt in the middle of the grill, over the aluminum pan. Over the seven-hour cook, ThermoWorks’ ambient probe near the pork registered temperatures about 27F lower than Weber’s controller reported – a wider gap than you’d expect from a pellet smoker, which might only read about 10F or 15F off target. The barbecue still turned out fantastic, with an intense but clean smoke flavor and exterior that contrasted nicely with the succulent meat, though it took longer than expected. The ThermoWorks probe never climbed above 200F. Inside the meat, Weber’s probe was off by about 10F, though that’s probably because the RFX meat probe, which I stuck into the pork shoulder, has four sensors that can more reliably find the meat’s coolest point, compared with a single sensor, like Weber’s, which must be placed precisely at the center.
When I asked Weber about the temperature disparity, the company said the ambient sensor, which sits against the inside of the ring, is calibrated to report the kettle’s average temperature as opposed to the temperature at any one spot. This may explain why its readings differed so much from those near the food.
The second cook
This time, I used 4lbs of charcoal, the same cherry chunks and another “sloppy snake”, but set the ring’s controller to 250F in an effort to get the air around the food closer to 225F.
When I was done, the pork emerged with a deep, well-developed bark and a more pronounced smoke flavor than I’d expect from a pellet smoker. The metal pan also kept the kettle tidy by catching much of the rendered fat.
How I plan to cook with it from now on
Going forward, I’ll use slightly more charcoal than I think I need, because the snake method lets you save any unburned charcoal for the next cook. You’ll also want to position the Weber’s grate so the hinged ends are above the charcoal, in case you have to adjust coals or wood chunks. After adding the meat, keep an eye on the kettle’s temperature for the first hour or so, using the app, or if you’re feeling old-school, look at the lid thermometer.
Weber’s Kettle Smart Ring videos claim you’ll never have to fiddle with the vents again, but until you have a few cooks under your belt, expect to adjust the lid vents. To raise the heat, open them a little wider and to lower the heat, close them a little bit, but not all the way.
During testing, I’ve been letting Weber’s controller choose when the fan comes on and off based on the temperature I picked. You may also want to use the controller’s manual mode, which offers 10 fan settings, including off. This will give you a little more control, but it requires you to adjust the fan as needed to keep the fire from getting too hot.
The Kettle Smart Ring doesn’t make it possible to smoke real barbecue – a Weber kettle has always been capable of that. What it does is make the process easier and more reliable, which matters when you’re investing eight to 12 hours cooking a large cut of pork or a brisket. It’s a modest upgrade that adds a new capability to a grill you already own and know how to use.

Weber
Kettle Smart Ring
$279.99
Other pieces you might enjoy from the Filter, the Guardian’s guide to buying fewer, better things: